rsync使用指引
rsync使用指引
一、简介
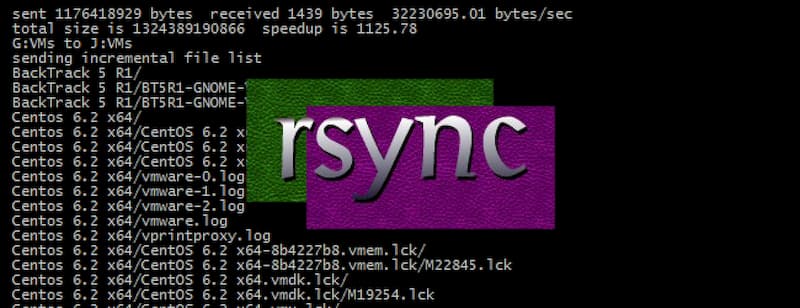
rsync是一个常用的Linux命令,用于文件同步。
它可以在本地计算机与远程计算机之间,或者两个本地目录之间同步文件(但不支持两台远程计算机之间的同步)。它也可以当作文件复制工具,替代cp和mv命令。

它名称里面的r指的是 remote,rsync 其实就是"远程同步"(remote sync)的意思。与其他文件传输工具(如 FTP 或 scp)不同,rsync 的最大特点是会检查发送方和接收方已有的文件,仅传输有变动的部分(默认规则是文件大小或修改时间有变动)。
二、安装
如果本机或者远程计算机没有安装 rsync,可以用下面的命令安装。
dnf -y install rsync注意,传输的双方都必须安装 rsync。
三、基本用法
3.1 -r参数
本机使用 rsync 命令时,可以作为cp和mv命令的替代方法,将源目录同步到目标目录。
rsync -r source destination上面命令中,-r表示递归,即包含子目录。注意,-r是必须的,否则 rsync 运行不会成功。source目录表示源目录,destination表示目标目录。
如果有多个文件或目录需要同步,可以写成下面这样。
rsync -r source1 source2 destination上面命令中,source1、source2都会被同步到destination目录。
3.2 -a参数
-a参数可以替代-r,除了可以递归同步以外,还可以同步元信息(比如修改时间、权限等)。由于 rsync 默认使用文件大小和修改时间决定文件是否需要更新,所以-a比-r更有用。下面的用法才是常见的写法。
rsync -a source destination目标目录destination如果不存在,rsync 会自动创建。执行上面的命令后,源目录source被完整地复制到了目标目录destination下面,即形成了destination/source的目录结构。
如果只想同步源目录source里面的内容到目标目录destination,则需要在源目录后面加上斜杠。
rsync -a source/ destination上面命令执行后,source目录里面的内容,就都被复制到了destination目录里面,并不会在destination下面创建一个source子目录。
3.3 -n参数
如果不确定 rsync 执行后会产生什么结果,可以先用-n或--dry-run参数模拟执行的结果。
rsync -anv source/ destination
-n参数模拟命令执行的结果,并不真的执行命令。
-v参数则是将结果输出到终端,这样就可以看到哪些内容会被同步。
3.4 --delete参数
默认情况下,rsync 只确保源目录的所有内容(明确排除的文件除外)都复制到目标目录。它不会使两个目录保持相同,并且不会删除文件。如果要使得目标目录成为源目录的镜像副本,则必须使用--delete参数,这将删除只存在于目标目录、不存在于源目录的文件。
rsync -av --delete source/ destination--delete参数会使得destination成为source的一个镜像。
四、排除文件
4.1 --exclude参数
有时,我们希望同步时排除某些文件或目录,这时可以用--exclude参数指定排除模式。
rsync -av --exclude='*.txt' source/ destination
# or
rsync -av --exclude '*.txt' source/ destination
上面命令排除了所有 TXT 文件。
注意,rsync 会同步以"点"开头的隐藏文件,如果要排除隐藏文件,可以这样写--exclude=".*"。如果要排除某个目录里面的所有文件,但不希望排除目录本身,可以写成下面这样。
rsync -av --exclude 'dir1/*' source/ destination多个排除模式,可以用多个--exclude参数。
rsync -av --exclude 'file1.txt' --exclude 'dir1/*' source/ destination多个排除模式也可以利用 Bash 的大扩号的扩展功能,只用一个--exclude参数。
rsync -av --exclude={'file1.txt','dir1/*'} source/ destination如果排除模式很多,可以将它们写入一个文件,每个模式一行,然后用--exclude-from参数指定这个文件。
rsync -av --exclude-from='exclude-file.txt' source/ destination4.2 --include参数
--include参数用来指定必须同步的文件模式,往往与--exclude结合使用。
rsync -av --include="*.txt" --exclude='*' source/ destination上面命令指定同步时,排除所有文件,但是会包括 TXT 文件。
五、远程同步
5.1 SSH协议
rsync 除了支持本地两个目录之间的同步,也支持远程同步。它可以将本地内容,同步到远程服务器。
rsync -av source/ username@remote_host:destination也可以将远程内容同步到本地。
rsync -av username@remote_host:source/ destinationrsync 默认使用 SSH 进行远程登录和数据传输。
由于早期 rsync 不使用 SSH 协议,需要用-e参数指定协议,后来才改的。所以,下面-e ssh可以省略。
rsync -av -e ssh source/ user@remote_host:/destination但是,如果 ssh 命令有附加的参数,则必须使用-e参数指定所要执行的 SSH 命令。
rsync -av -e 'ssh -p 2234' source/ user@remote_host:/destination上面命令中,-e参数指定 SSH 使用2234端口。5.2 rsync协议
除了使用 SSH,如果另一台服务器安装并运行了 rsync 守护程序,则也可以用rsync://协议(默认端口873/tcp)进行传输。具体写法是服务器与目标目录之间使用双冒号分隔::。
rsync -av source/ 192.168.122.32::module/destination注意,上面地址中的module并不是实际路径名,而是 rsync 守护程序指定的一个资源名,由管理员分配。
如果想知道 rsync 守护程序分配的所有 module 列表,可以执行下面命令。
rsync rsync://mirrors.tuna.tsinghua.edu.cnrsync 协议除了使用双冒号,也可以直接用rsync://协议指定地址。
rsync -av source/ rsync://192.168.122.32/module/destination六、增量备份
rsync 的最大特点就是它可以完成增量备份,也就是默认只复制有变动的文件。
除了源目录与目标目录直接比较,rsync 还支持使用基准目录,即将源目录与基准目录之间变动的部分,同步到目标目录。
具体做法是,第一次同步是全量备份,所有文件在基准目录里面同步一份。以后每一次同步都是增量备份,只同步源目录与基准目录之间有变动的部分,将这部分保存在一个新的目标目录。这个新的目标目录之中,也是包含所有文件,但实际上,只有那些变动过的文件是存在于该目录,其他没有变动的文件都是指向基准目录文件的硬链接。
--link-dest参数用来指定同步时的基准目录。
rsync -a --delete --link-dest /compare/path /source/path /target/path上面命令中,--link-dest参数指定基准目录/compare/path,然后源目录/source/path跟基准目录进行比较,找出变动的文件,将它们拷贝到目标目录/target/path。那些没变动的文件则会生成硬链接。这个命令的第一次备份时是全量备份,后面就都是增量备份了。
下面是一个脚本示例,备份用户的主目录。
#!/bin/bash

# A script to perform incremental backups using rsync

set -o errexit
set -o nounset
set -o pipefail

readonly SOURCE_DIR="${HOME}"
readonly BACKUP_DIR="/mnt/data/backups"
readonly DATETIME="$(date '+%Y-%m-%d_%H:%M:%S')"
readonly BACKUP_PATH="${BACKUP_DIR}/${DATETIME}"
readonly LATEST_LINK="${BACKUP_DIR}/latest"

mkdir -p "${BACKUP_DIR}"

rsync -av --delete \
  "${SOURCE_DIR}/" \
  --link-dest "${LATEST_LINK}" \
  --exclude=".cache" \
  "${BACKUP_PATH}"

rm -rf "${LATEST_LINK}"
ln -s "${BACKUP_PATH}" "${LATEST_LINK}"上面脚本中,每一次同步都会生成一个新目录${BACKUP_DIR}/${DATETIME},并将软链接${BACKUP_DIR}/latest指向这个目录。下一次备份时,就将${BACKUP_DIR}/latest作为基准目录,生成新的备份目录。最后,再将软链接${BACKUP_DIR}/latest指向新的备份目录。
七、配置项
-a、--archive参数表示存档模式,保存所有的元数据,比如修改时间(modification time)、权限、所有者等,并且软链接也会同步过去。
--append参数指定文件接着上次中断的地方,继续传输。
--append-verify参数跟--append参数类似,但会对传输完成后的文件进行一次校验。如果校验失败,将重新发送整个文件。
-b、--backup参数指定在删除或更新目标目录已经存在的文件时,将该文件更名后进行备份,默认行为是删除。更名规则是添加由--suffix参数指定的文件后缀名,默认是~。
--backup-dir参数指定文件备份时存放的目录,比如--backup-dir=/path/to/backups。
--bwlimit参数指定带宽限制,默认单位是 KB/s,比如--bwlimit=100。
-c、--checksum参数改变rsync的校验方式。默认情况下,rsync 只检查文件的大小和最后修改日期是否发生变化,如果发生变化,就重新传输;使用这个参数以后,则通过判断文件内容的校验和,决定是否重新传输。
--delete参数删除只存在于目标目录、不存在于源目标的文件,即保证目标目录是源目标的镜像。
-e参数指定使用 SSH 协议传输数据。
--exclude参数指定排除不进行同步的文件,比如--exclude="*.iso"。
--exclude-from参数指定一个本地文件,里面是需要排除的文件模式,每个模式一行。
--existing、--ignore-non-existing参数表示不同步目标目录中不存在的文件和目录。
-h参数表示以人类可读的格式输出。
-h、--help参数返回帮助信息。
-i参数表示输出源目录与目标目录之间文件差异的详细情况。
--ignore-existing参数表示只要该文件在目标目录中已经存在,就跳过去,不再同步这些文件。
--include参数指定同步时要包括的文件,一般与--exclude结合使用。
--link-dest参数指定增量备份的基准目录。
-m参数指定不同步空目录。
--max-size参数设置传输的最大文件的大小限制,比如不超过200KB(--max-size='200k')。
--min-size参数设置传输的最小文件的大小限制,比如不小于10KB(--min-size=10k)。
-n参数或--dry-run参数模拟将要执行的操作,而并不真的执行。配合-v参数使用,可以看到哪些内容会被同步过去。
-P参数是--progress和--partial这两个参数的结合。
--partial参数允许恢复中断的传输。不使用该参数时,rsync会删除传输到一半被打断的文件;使用该参数后,传输到一半的文件也会同步到目标目录,下次同步时再恢复中断的传输。一般需要与--append或--append-verify配合使用。
--partial-dir参数指定将传输到一半的文件保存到一个临时目录,比如--partial-dir=.rsync-partial。一般需要与--append或--append-verify配合使用。
--progress参数表示显示进展。
-r参数表示递归,即包含子目录。
--remove-source-files参数表示传输成功后,删除发送方的文件。
--size-only参数表示只同步大小有变化的文件,不考虑文件修改时间的差异。
--suffix参数指定文件名备份时,对文件名添加的后缀,默认是~。
-u、--update参数表示同步时跳过目标目录中修改时间更新的文件,即不同步这些有更新的时间戳的文件。
-v参数表示输出细节。-vv表示输出更详细的信息,-vvv表示输出最详细的信息。
--version参数返回 rsync 的版本。
-z参数指定同步时压缩数据。
八、参数链接
- How To Use Rsync to Sync Local and Remote Directories on a VPS, Justin Ellingwood
- Mirror Your Web Site With rsync, Falko Timme
- Examples on how to use Rsync, Egidio Docile
- How to create incremental backups using rsync on Linux, Egidio Docile
九、原文链接
阮一峰的网络日志: https://www.ruanyifeng.com/blog/2020/08/rsync.html


